How to Construct Twisted Brick Columns (Spiral Brick Pillars)
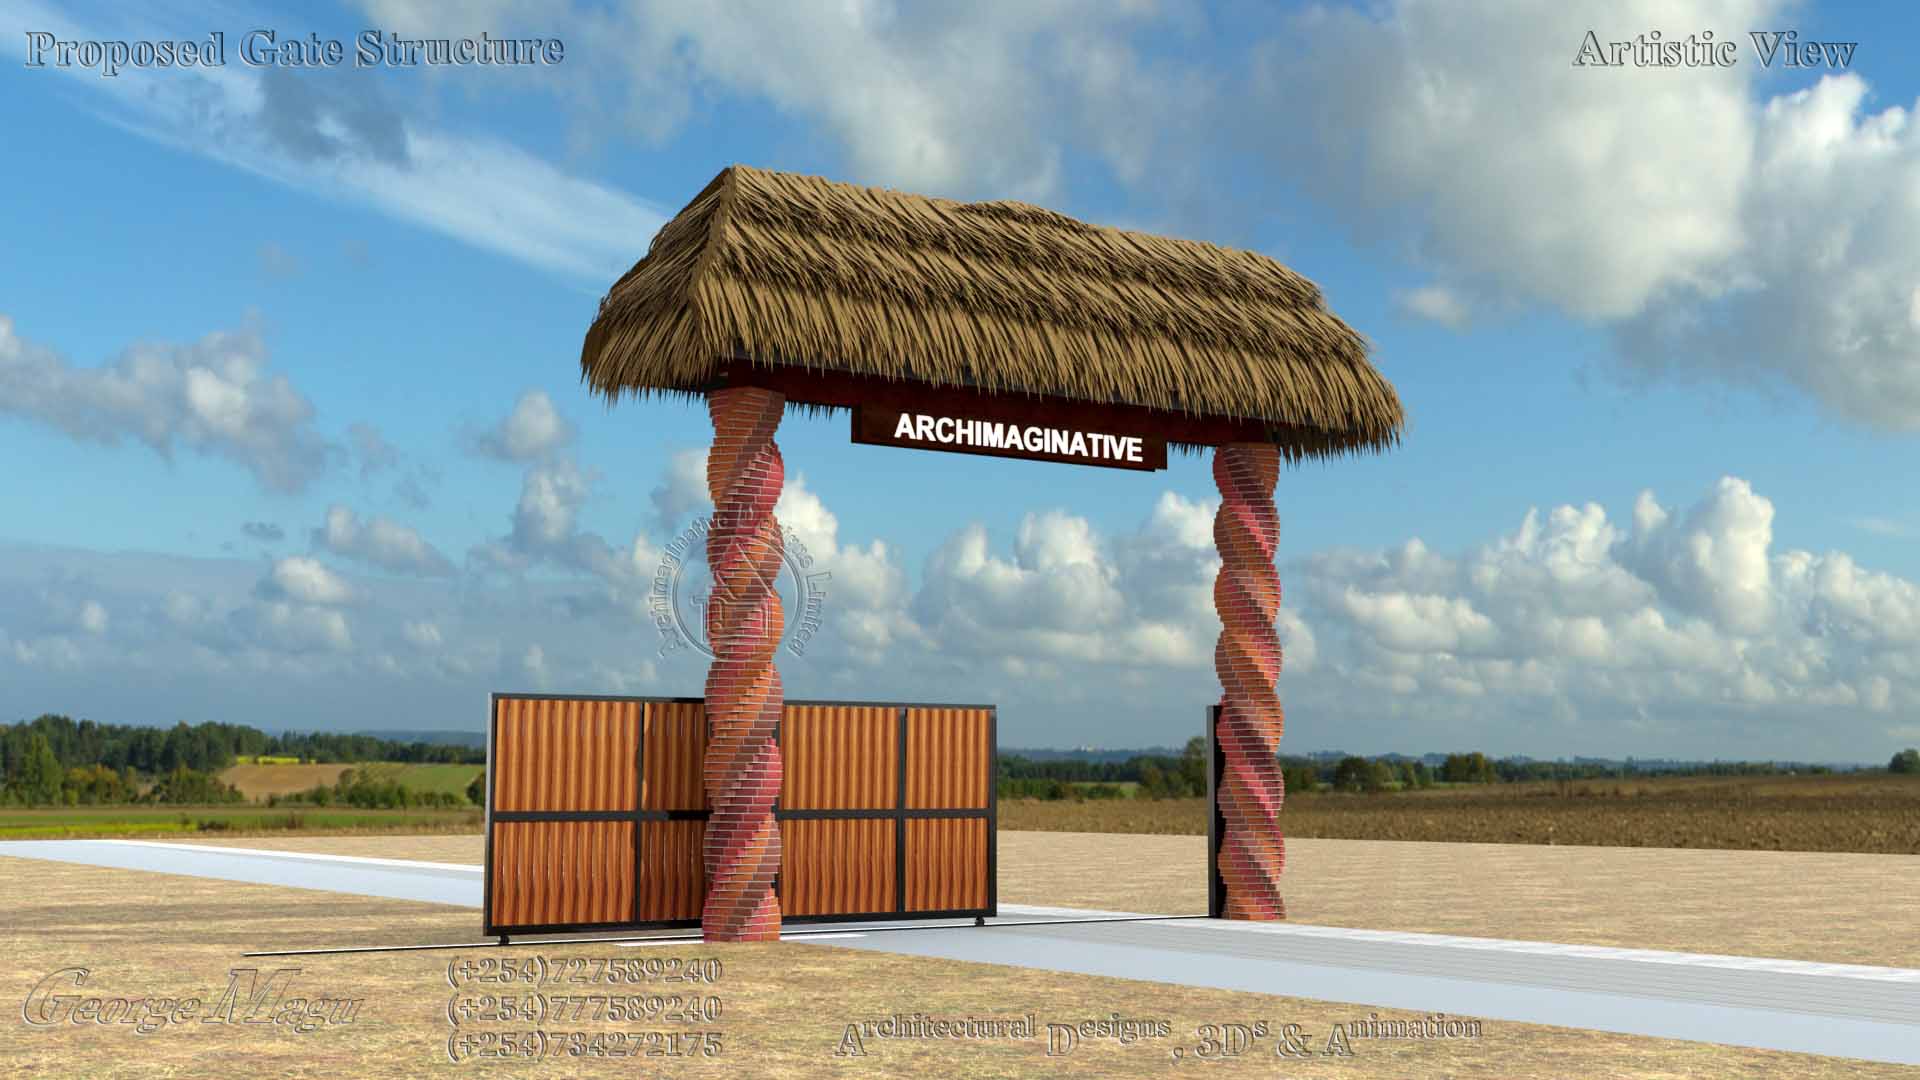
Twisted brick columns, also called spiral brick pillars, are decorative structural elements created by rotating brick courses gradually as the column rises. They are commonly used on gates, entrances, gazebos, verandas, and feature walls to create a striking artistic appearance.
Thank you for reading this post, don't forget to subscribe!The twisted columns shown below create a bold architectural statement and can become the focal point of a gate entrance or entrance porch.
Materials Required
Materials
- Machine-cut bricks or well-burnt clay bricks
- Cement
- Sand
- Ballast (for foundation)
- Reinforcement bars (optional but recommended)
- Hoop iron or binding wire
- Water
- Timber for templates
- Steel pipe or central reinforcement pole (optional)
Tools
- Spirit level
- Plumb bob
- Mason’s line
- Trowel
- Measuring tape
- Grinder or brick cutter
- Square
- Wheelbarrow
- Shovel
Step 1: Prepare the Foundation
Twisted columns are heavier than normal columns because of the decorative brick arrangement. A strong foundation is therefore essential.
Procedure
- Excavate foundation pits to suitable depth depending on soil conditions.
- Compact the bottom.
- Pour hardcore if necessary.
- Cast reinforced concrete footing.
- Leave starter bars protruding upward if reinforcement is required.
Recommended Foundation Size
For medium gate columns:
- Minimum footing: 900mm × 900mm
- Depth: 600mm–1200mm depending on soil
Allow the concrete to cure properly before starting brickwork.
Step 2: Set Out the Column Size
Determine the column dimensions.
Example:
- 450mm × 450mm
- 600mm × 600mm
Mark the center point carefully because the twisting effect depends on accurate alignment.
Step 3: Install a Central Guide
This is one of the most important steps.
Install:
- a steel pipe,
- timber pole,
- or reinforcement cage
at the center of the column.
The guide helps:
- maintain vertical alignment,
- control the twisting angle,
- support the brickwork.
Step 4: Create a Rotation Template
To achieve uniform twisting:
- Cut timber templates matching the column size.
- Mark rotation points at equal angles.
- Rotate each level slightly.
Example:
- Rotate each course by 5°–10°.
The gradual rotation creates the spiral effect.
Step 5: Lay the First Brick Course
Lay the first course perfectly level.
This first course determines:
- column stability,
- alignment,
- final appearance.
Use:
- spirit level,
- square,
- mason line.
Do not begin twisting immediately.
Usually:
- the first 2–3 courses remain straight.
Step 6: Begin the Twisting Pattern
After the base courses:
- Rotate the next brick course slightly.
- Continue rotating every course gradually in the same direction.
- Maintain equal mortar joints.
The rotation must remain consistent.
Important
Do NOT rotate too much at once.
Too much rotation causes:
- instability,
- poor bonding,
- weak structure.
Recommended:
- 5° per course for gentle twist
- 7°–10° for dramatic twist
Step 7: Cut Bricks Where Necessary
As the spiral develops:
- some brick edges may project,
- gaps may appear.
Use a grinder or brick cutter to:
- trim edges,
- maintain neat joints,
- improve bonding.
This greatly improves the final appearance.
Step 8: Constantly Check Alignment
During construction:
- use a plumb bob frequently,
- check verticality,
- confirm equal rotation.
A small error at the bottom becomes very noticeable at the top.
Step 9: Reinforce the Column (Recommended)
For tall gate columns:
Use:
- vertical steel bars,
- concrete core filling,
- hoop reinforcement.
Recommended Method
- Build hollow center.
- Insert reinforcement bars.
- Fill the center with concrete gradually.
This improves:
- strength,
- durability,
- wind resistance.
Step 10: Finish the Top Section
At the top:
- stop the rotation gradually,
- return to square alignment if supporting beams or roofing.
Cast:
- ring beam,
- concrete cap,
- or steel connection plate.
This helps support:
- gate roofing,
- timber beams,
- signage.
Step 11: Pointing and Finishing
After curing:
- clean mortar stains,
- brush joints,
- apply protective sealant if desired.
You may leave the bricks:
- exposed,
- painted,
- or coated with clear sealer.
Construction Tips for Builders
1. Use Quality Bricks
Poor bricks crack easily when cut.
2. Maintain Equal Rotation
Inconsistent angles spoil the spiral effect.
3. Use Moderate Mortar Thickness
Very thick joints weaken the column.
Recommended mortar ratio:
- 1:4 cement:sand
Common Mistakes to Avoid
Over-Rotating
Too much twist weakens bonding.
Weak Foundation
Heavy columns may settle unevenly.
Poor Alignment
The column may appear bent instead of twisted.
No Reinforcement
Tall gate columns can crack under wind loads.
Advantages of Twisted Columns
- Unique artistic appearance
- Strong visual identity
- Enhances gate entrances
- Increases property prestige
- Creates luxury architectural appeal
Conclusion
Twisted brick columns are an excellent way to create an eye-catching architectural entrance. Although they require patience, accuracy, and skilled workmanship, the final result can become a landmark feature for any property.
The key to success is:
- strong foundations,
- gradual rotation,
- consistent alignment,
- proper reinforcement,
- careful finishing.
When properly executed, twisted columns combine both structural function and artistic beauty.
